
Anaconda is a popular open-source Python distribution that provides an all-in-one environment for scientific computing, data analysis, and machine learning. It comes pre-installed with over 1,500 packages and is designed to be easy to use for both novice and advanced users. In this article, we’ll cover the installation of Anaconda on Windows and macOS and provide tips and tutorials on how to use it effectively.
Installation on Windows
To install Anaconda on Windows, follow these steps:
- Download the Anaconda installation script from the official website (https://www.anaconda.com/products/distribution).
- Double-click the downloaded executable file (e.g., Anaconda3-version-Windows-x86[_64].exe) to launch the installation wizard.
- Follow the prompts in the installation wizard. By default, Anaconda will be installed in the C:\ProgramData\Anaconda3 directory.
- Once the installation is complete, add the Anaconda installation directory to your PATH environment variable so that you can use the conda command from anywhere. You can do this by following these steps:
a. Right-click the Windows Start button and select System.
b. Click on Advanced system settings.
c. Click on Environment Variables.
d. Under System Variables, scroll down and find the Path variable, then click on Edit.
e. Click on New and add the path to the Anaconda installation directory (e.g., C:\ProgramData\Anaconda3). - Close and reopen any terminal or command prompt windows to activate the changes.
- Verify that the installation was successful by opening a terminal or command prompt window and running the following command:
conda –version
Installation on macOS
To install Anaconda on macOS, follow these steps:
- Download the Anaconda installation script from the official website (https://www.anaconda.com/products/distribution).
- Open a terminal window and navigate to the directory where the installation script was downloaded.
- Run the installation script using the following command:
bash Anaconda-version-MacOSX-x86[_64].sh
Follow the prompts in the installation wizard. By default, Anaconda will be installed in the ~/anaconda directory.
- Once the installation is complete, add the Anaconda bin directory to your PATH environment variable so that you can use the conda command from anywhere. You can do this by adding the following line to your shell startup file (e.g., .bash_profile for bash users):
export PATH=”~/anaconda/bin:$PATH”
- Close and reopen your terminal window to activate the changes.
- Verify that the installation was successful by running the following command:
conda –version
Usage
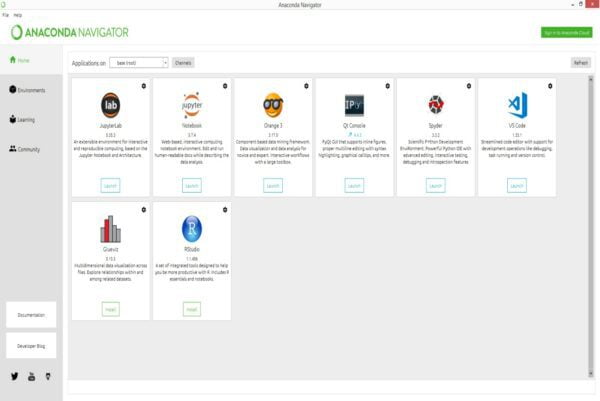
Anaconda comes with several tools and features that make it easy to manage packages, create virtual environments, and launch Jupyter notebooks. Here are some guidelines to help you get started:
- Package management: Use the conda command to manage packages and environments. Some common commands include:
conda install <package_name>: Installs a package.conda update <package_name>: Updates a package.conda remove <package_name>: Removes a package.conda list: Lists all installed packages.conda search <package_name>: Searches for a package.
- Virtual environments: Anaconda makes it easy to create and manage virtual environments. A virtual environment is a self-contained environment that contains its own set of packages and dependencies. To create a new virtual environment, use the following command:
conda create --name <env_name>To activate a virtual environment, use the following command:
conda activate <env_name>- Jupyter notebooks: Jupyter notebooks are a popular tool for data analysis and visualization. Anaconda comes pre-installed with Jupyter notebooks, and you can launch them by running the following command:
jupyter notebookThis will open the Jupyter dashboard in your web browser, where you can create and edit notebooks.
Tutorials and Resources
Here are some tutorials and resources to help you learn more about Anaconda and how to use it effectively:
- Anaconda Documentation (https://docs.anaconda.com/): The official documentation provides a comprehensive guide to using Anaconda, including tutorials, FAQs, and best practices.
- YouTube Videos:
- Blogs:
In conclusion, Anaconda is a powerful and versatile Python distribution that provides an all-in-one environment for scientific computing, data analysis, and machine learning. Whether you’re a beginner or an advanced user, Anaconda provides a wealth of tools and resources to help you get the most out of your data.


